| Channel | Publish Date | Thumbnail & View Count | Download Video |
|---|---|---|---|
 | Publish Date not found | 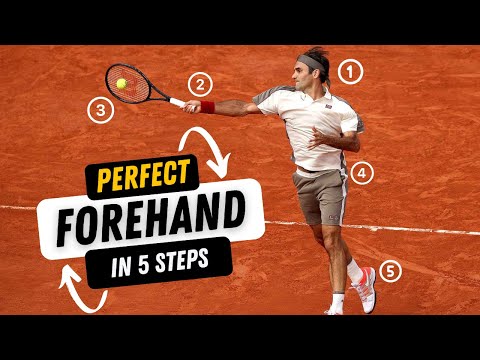 0 Views |
The forehand in tennis is the most important shot after the serve and return. That's why it's very important to work on the forehand and master it. In this tennis lesson, coach Simon Konov from Top Tennis Training shows you in five steps how to hit the perfect forehand – a true master class in tennis forehand play.
Tennis forehand grips
The foundation of any player's forehand is the way they hold the racket, or grip. In tennis, there are three main grips for the forehand: the eastern forehand grip, the semi-western forehand grip, and the western forehand grip.
Most ATP and WTA tennis professionals use the semi-western forehand grip.
Roger Federer and Juan Martin Del Potro use an eastern forehand grip. Jack Sock and Nick Kyrgios use a western forehand grip.
We recommend the semi-western grip as it allows you to generate topspin and flatten the forehand, and makes it easier to handle low, medium and high balls.
The ready position on your forehand
The ready position is the position you wait in with your racket when you do a split step. Try to hold the racket with your forehand grip as you want to cover 60-70% of the court with your forehand. The racket head should be above the handle of the racket and the non-hitting hand should be either on the racket neck or on the top of the handle.
Roll up the upper body
Try to roll up your upper body as early as possible. Rolling up your upper body means turning your left shoulder towards the incoming ball, storing energy in your core muscles. This rotation also ensures that the club begins its swing towards the power position. The faster you roll up, the more time you gain for the shot.
Achieve a perfect position of power
Once you've rolled the upper body up and moved toward the ball, you should be in an ideal power position. A good power position is usually with the clubhead above grip height, the arm away from the body, the non-hitting arm extended across the body to track the incoming ball, and the legs braced and ready to make the shot.
Forehand delay
From the power position, the legs and torso then initiate the forward phase of the forehand swing. With a relaxed arm and wrist, this release of tension from the legs and unwinding of the upper body causes the club head to lag behind the arm and the handle of the club. This deceleration phase gives you additional leverage or power on the ball.
Contact point
Try to hit the ball in front of your body. Hitting the ball in front of your body allows the entire body to support the racket in the hitting zone and both eyes can track the ball on the strings.
Follow through and finish
After the point of contact, it's all about finishing the forehand stroke in a way that's easy on the arm. There are different finishes you can use and each serves a purpose, but generally the finish across the chest is the one you'll want to master and use most often. Bend the elbow and come across the chest, with the racket ending wrapped around your body.
In the Forehand Masterclass, Coach Simon will cover all of these forehand topics:
1. Tennis forehand grips
2. Forehand ready position
3. Rolling up and down on the forehand
4 The unit rotation on the forehand
5. The poser position on the forehand
6. Forehand positions
7. Loading and exploding on the forehand
8. How to use your legs correctly on the forehand
9. Forehand delay and how to achieve it
10. The contact point on the forehand
11. The windshield wiper movement on the forehand
12. Follow-through and forehand finishes
Video timeline:
00:00 – Lesson introduction
00:26 – Tennis forehand grips
01:30 – The standby position
02:52 – Rolling up on the forehand
05:09 – Position of power
06:40 – Leg strain
06:57 – Forehand positions
08:08 – Forehand delay
10:10 – Contact point on the forehand
10:40 – Follow through and finish
#tennis #forehand #toptennistraining
Please take the opportunity to connect with your friends and family and share this video with them if you find it useful.